- Features & Documentation
- Entropy
Inter-channel Entropy-driven Detail Enhancement
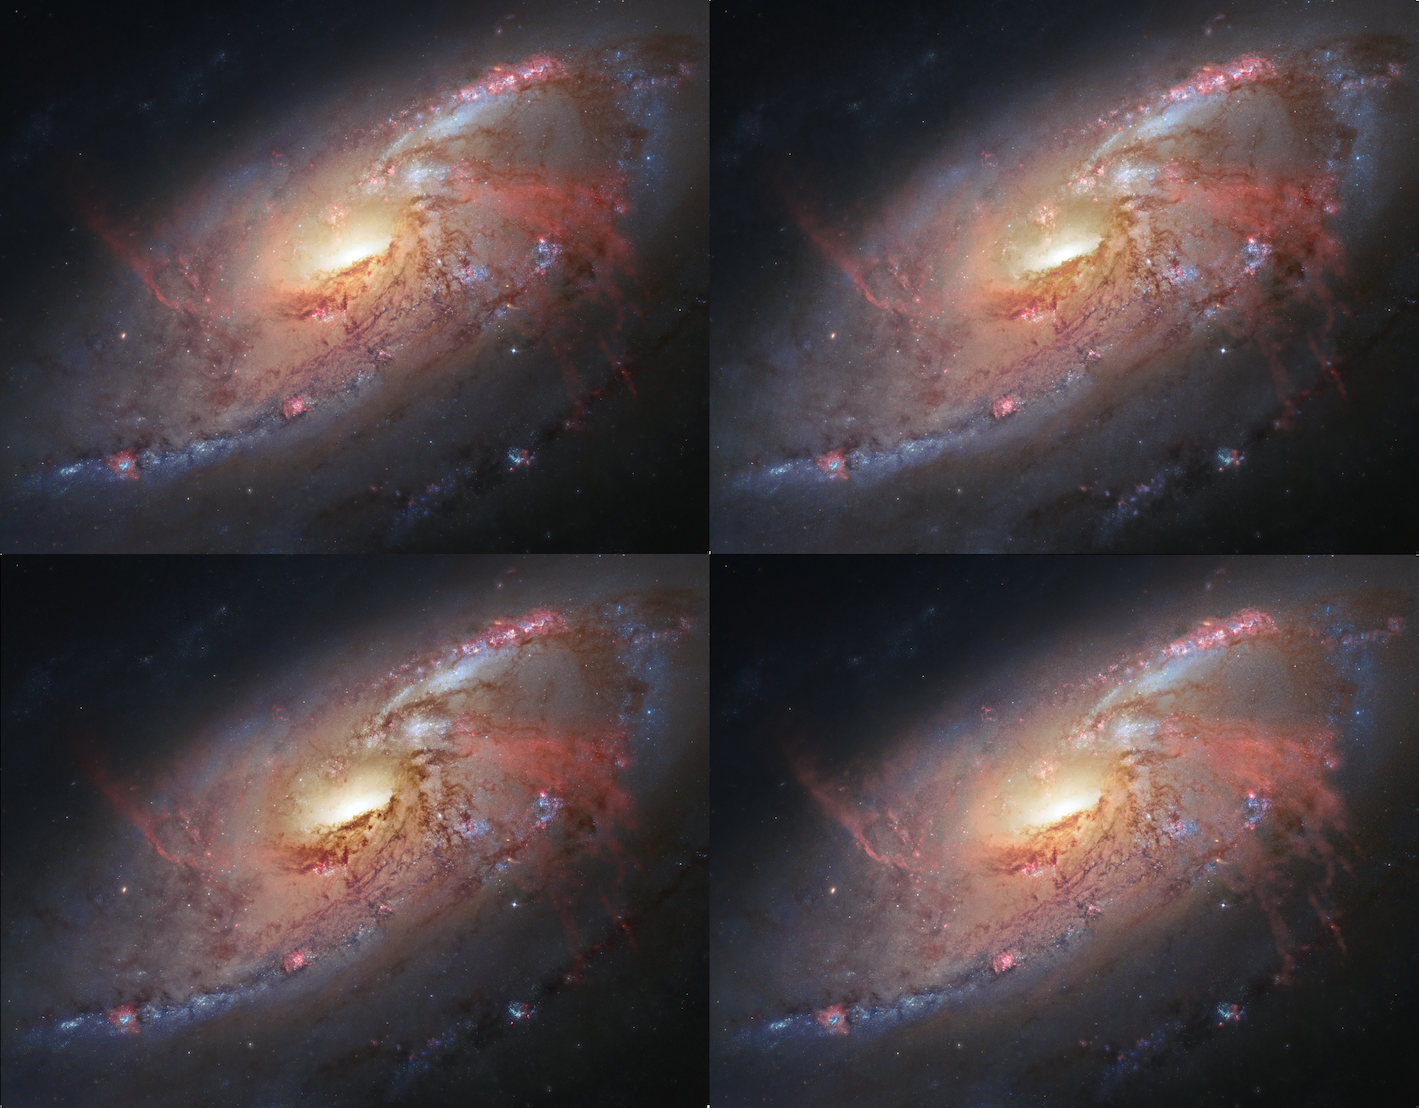
The Entropy module is a novel module that enhances detail in your image, using latent detail cues in the color information of your dataset.
The Entropy module exploits the same basic premise as the Filter module; that is, the observation that many interesting features and objects in outer space have distinct colors, owing to their chemical make up and associated emission lines. This correlation become 100% when considering a narrowband composite, where each channel truly is made up of data from distinct parts of the spectrum.
The Entropy module works by evaluating entropy (a measure of "busyness" or "randomness") as a proxy for detail. It does so on a local level in each colour channel for each pixel. Once this measure has been established for each pixel, the individual channel's contribution to luminance for each pixel is re-weighted in CIELab space to better reflect the contribution of visible detail in that channel.
The result is that the luminance contribution of a channel with less detail in a particular area is attenuated. Conversely, the luminance contribution of a channel with more detail in a particular area is boosted. Overall, this has the effect of accentuating latent structures and detail in a very natural manner. Operating entirely in CIELab space means that, psychovisually, there is no change in colour, only brightness.
The above attributes make the Entropy module an an extremely powerful tool for narrowband composites in particular.
The Entropy module is effective both on already processed images, as well as Tracked datasets.
Usage
The Entropy module is very flexible in its image presentation. To start using the Entropy module, an entropy map needs to be generated by clicking the 'Do' button. This map's resolution/accuracy can be chosen by using the 'Resolution' parameter. The 'Medium' resolution is sufficient in most cases.
For the entropy module to be able to identify detail, the dataset should ideally be of an image-filling object or scene.
After obtaining a suitable entropy map, the other parameters can be tweaked in real-time;
The 'Strength' parameter governs the overall strength of the boost or attenuation of luminance. Overdriving the 'Strength' parameter too much may make channel transitions too visible. In this case you may wish to pull back, or increase the 'Midtone Pull Filter' size to achieve a smoother blend.
The 'Dark/Light Enhance' parameter enables you to choose the balance between darkening and brightening of areas in the image. To only brighten the image (for example if you wish to bring out faint H-alpha, but nothing else), set this parameter to 0%/ 100%. To only darken the image (for example to better show a bright DSO core) bring the balance closer to 100%/0%.
The 'Channel Selection' parameter allows you to only target certain channels. For example, if you wish to enhance S-II more visible in a Hubble-palette image, set this parameter to red (to which S-II should be mapped). S-II will now be boosted, and H-alpha and O-III will be pushed back where needed to aid S-II's contrast. If you wish to avoid the other channels being pushed back, simply set the 'Dark/Light Enhance' to 0/100%.
The 'Midtone Pull Filter' and 'Midtone Pull Strength' parameters, assist in keeping any changes in the brightness of your image confined to the area where they are most effective and visible; the midtones. This feature can be turned off by setting 'Midtone Pull Strength' to 0%. When on, the filter selectively accepts or rejects changes to pixels, based on whether they are close to half unity (e.g. neutral gray) or not. This feature works analogous to creating a HDR composite from different exposure times. The transition boundaries between accepted and rejected pixels are smoothened out by increasing the 'Midtone Pull Filter' parameter.
You may also be interested in...
- Unified De-Noise: Detail Aware Wavelet-based Noise Reduction and Noise Grain Shaper (under Features & Documentation)
The Unified De-Noise module offers temporal, astro-specific noise reduction.
- Stage 1: Signal stretch and contribution calibration (under Usage)
It is important to understand that the signal as show during this first stage, is merely signal that is up for consideration by the second stage.
- Color retention (under Usage)
The two aspects - colour and luminance - of your image are neatly separated thanks to StarTools' signal evolution Tracking engine.
- Usage (under Denoise)
- Creating a suitable star mask (under Usage)
This time set 'Old Mask' to 'Add New To Old' to add the newly generated mask to the mask we already have.